Camera trapping Shetland's otters.

Updated: May 13

Before delving into the topic of Shetland otters, I will briefly discuss my experience with camera traps and other UK mustelids. Prior to moving to Shetland, I had considerable experience with remote camera work involving badgers and pine martens. I must say, these species are much easier to work with compared to otters! Badgers are large, dry, and relatively predictable, making it easy for them to trigger a system in the field. Pine martens are even simpler, as they will do almost anything for peanut butter (I realise now that using bait with wildlife isn't ideal, but it's how most of the images of the species is obtained, regardless of what the caption might claim).

I had also attempted camera trapping otters in freshwater habitats before having a go with those in Shetland. As these were all at waterside locations, I essentially had a string of failures. A wet otter, briefly slipping in and out of a river to defecate, often fails to trigger a PIR system. I had some grand ideas, and even though I could see from my trail camera footage that otters were using my chosen locations, the best I would get was little more than a tail exiting the frame.

Housing
Initially, I made my own housing from cheaper versions of the 30cm Pelicase you find on Amazon. Drill a hole to fit a 72mm UV filter (82mm if you will be using very wide lenses), fix in place with silicone, and you are almost ready to go. The difficulties arise with fixing an effective tripod mount that doesn't flex. Frequent high wind here will lead to vibration and potentially soft images unless you are using a very high shutter speed. However, a few years ago I bought one of the Camtraptions housings, which has built-in mounting points, a more rigid structure, and is frankly a hell of a lot easier to work with on all fronts.
Sensors
Again, my early attempts were with DIY systems. I bought cheap PIR units which I built into homemade housing. They worked fairly well in an urban environment, but they didn't last long outside in the elements, with corrosion and or pulled wires as a result of my amateur soldering, making their usefulness short-lived. I have since had success with both TriggerSmart break beam style sensors and the later (versions 2 and 3) Camtraptions sensors; however, these do not fare well in wet conditions. Several have had to be sent back for repair or replacement; it seems moisture gets in around some of the dials. I am trialing the V4 at the moment, which is claimed to have better weather sealing; fingers crossed it can survive the elements in Shetland. Even after over ten years I still have my original TriggerSmart sensor; with its very simple construction, there is less to go wrong. However, as it is essentially two boxes with a beam sent from one to the other, it isn't always practical in the field, especially for wide-angle shots when they are difficult to hide outside the frame. Where it comes into its own is in an urban environment; a beam is very precise, so, for example, if you place it across a doorway, you know it will only trigger at that exact point, its trigger response is also very reliable.
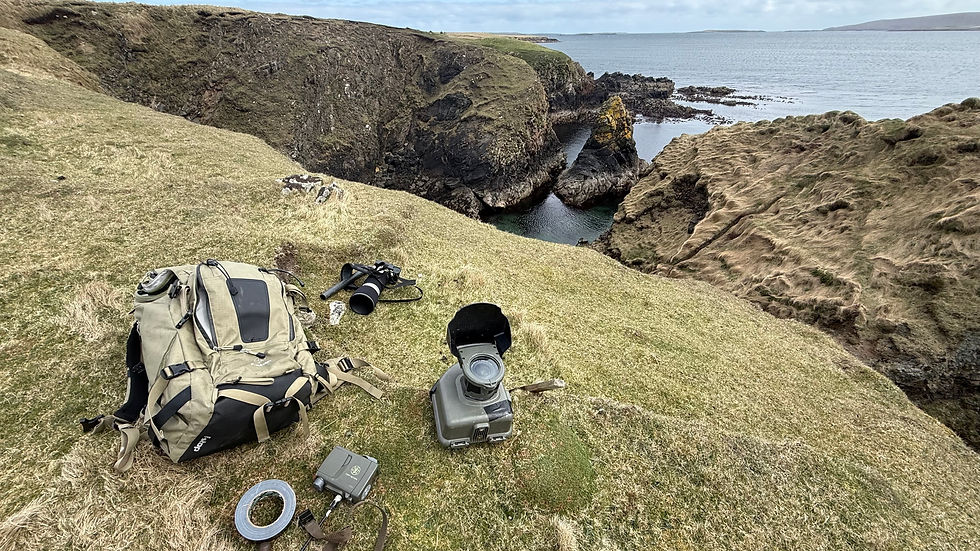
Camera settings
By far the best way of adjusting the settings is to pair the camera with one of the dedicated apps on your phone before closing the housing (the Canon, camera connect app in my case). Once you have chosen your desired composition and set the camera to manual mode, link the camera to your phone app via the Wi-Fi function. Then select the live view mode on your phone where you can adjust your settings and even re-compose all whilst the camera remains as it will once you leave the system to shoot by itself. The specific camera settings required vary widely depending on what you want to achieve. However, a good start to catch a sharp, in-focus otter using a spraint site, for example, would be to use 1/800 sec, f8, and set ISO to auto. A higher frame rate (H+ on Canon systems) can be used for mirrorless cameras, but for a DSLR, use the silent shooting option (not actually silent but a little quieter) and limit the frame rate to a short burst of 3-4 to avoid it drawing too much attention from the animals.
Sensor settings
I won't go into much detail on the sensor settings. Both TriggerSmart and Camtraptions have extensive setup guides for these on their respective websites. However, in relation to otters, I would recommend the following. Set the sensor to shoot in both daylight and darkness. As otters can be active across both, you never know what and when you could capture. I would also have the sensor sensitivity set at the higher end; otters are low-slung critters that don't trigger a system easily. Where you are using a DSLR, limit the frame rate to 3-4 frames per burst or single and silent. Not having the camera rattling off at a higher rate will stop it from being too intrusive.
Cable or wireless?
There are both cable and wireless sensors on the market. Wireless sensors offer greater flexibility and reliability, even though they have a shorter battery life and require an additional receiver to be connected to the camera with a short cable. Once they become accustomed to a system, otters can be quite destructive, nosing into the spaces between the sensor and housing, under tripod mounts, and around any stands or ground spikes you might use. Therefore, having no external cables that can be pulled or damaged is a major benefit. This is also why I don't recommend using cylindrical ground spikes (although the latest camtraptions V4 sensor can accommodate two, spaced apart to prevent spinning); anything mounted on them often ends up facing the wrong direction. In fact, the most secure way to mount an off-camera sensor is to cable tie it to a short piece of 1 x 2 inch wood with one end cut to a point. Hammer it into the ground with a mallet until it's secure enough not to be easily moved.
Ethics
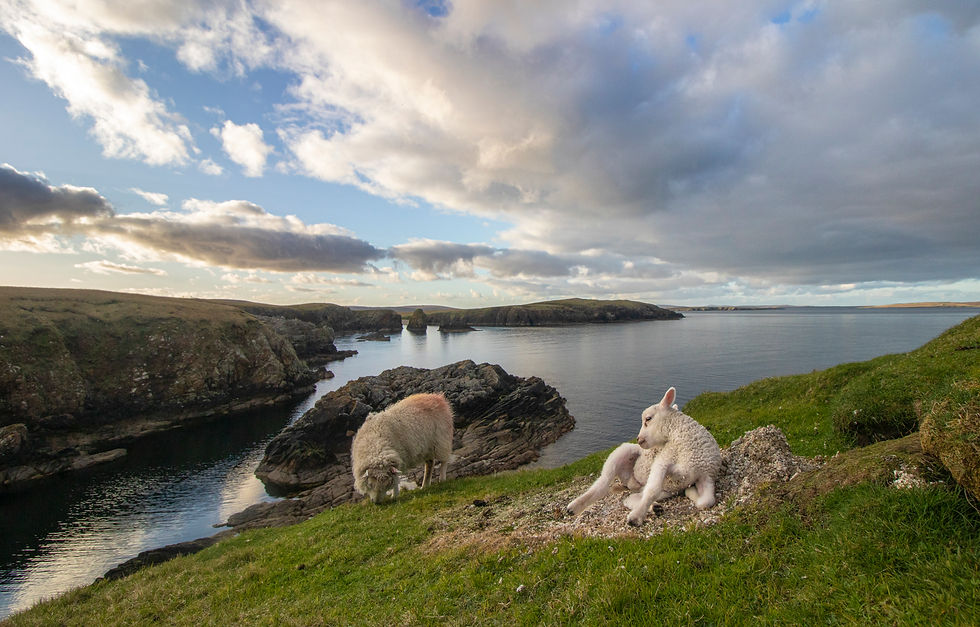
The ethics surrounding camera placement are complex. I work under a license granted by NatureScot, which is part of my broader role with Shetland Nature. Without this license, the law dictates that cameras should not be placed within 30 meters of a holt, and no closer than 200 meters to a natal holt (one used by a mother and her cubs). Although this may initially appear excessive, otters are very neophobic, and if cameras are not introduced carefully, you can easily frighten an animal away from its holt.
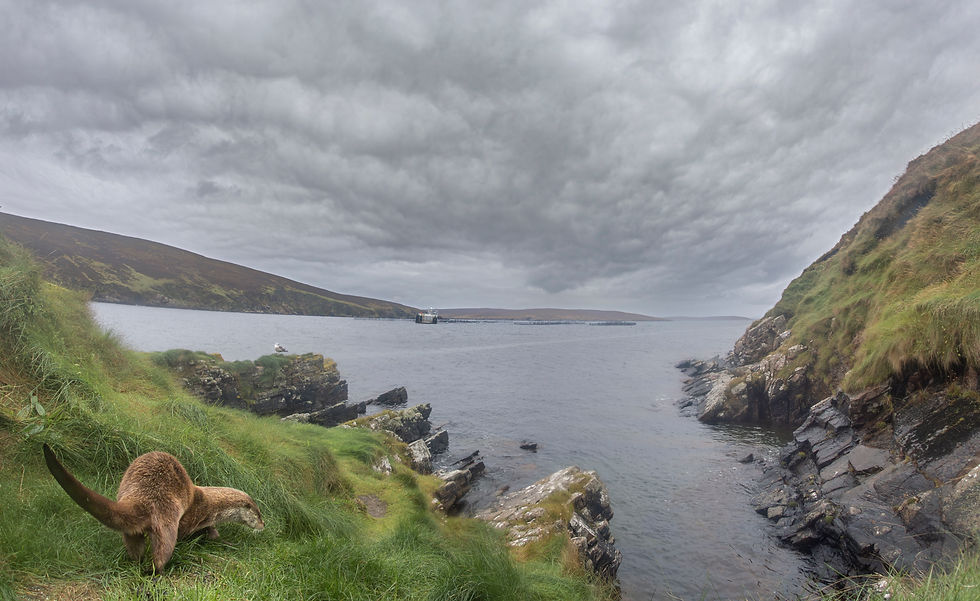
When done gradually and carefully, a camera can be placed in the field without disruption to the animals involved. Here is my approach for setting up a camera trap system to photograph otters.
Firstly, (and this is especially important if you are using a DSLR camera rather than a mirrorless body) introduce the housing only. Placement of the housing also needs care; make sure you use the surrounding environment to hide it. For example, prop it against an existing feature like a rock pile or amongst vegetation, and well back from the route the otter is likely to take.
Never place the unit directly on an otter trail or between the sea and wherever the animals are trying to access, i.e., a spraint site or fresh water. If you are unsure of the route the otters are taking, you can use a no-glow trail camera to observe their patterns a week or so before placing the full system on the ground. This may well be the key to choosing the best composition too.
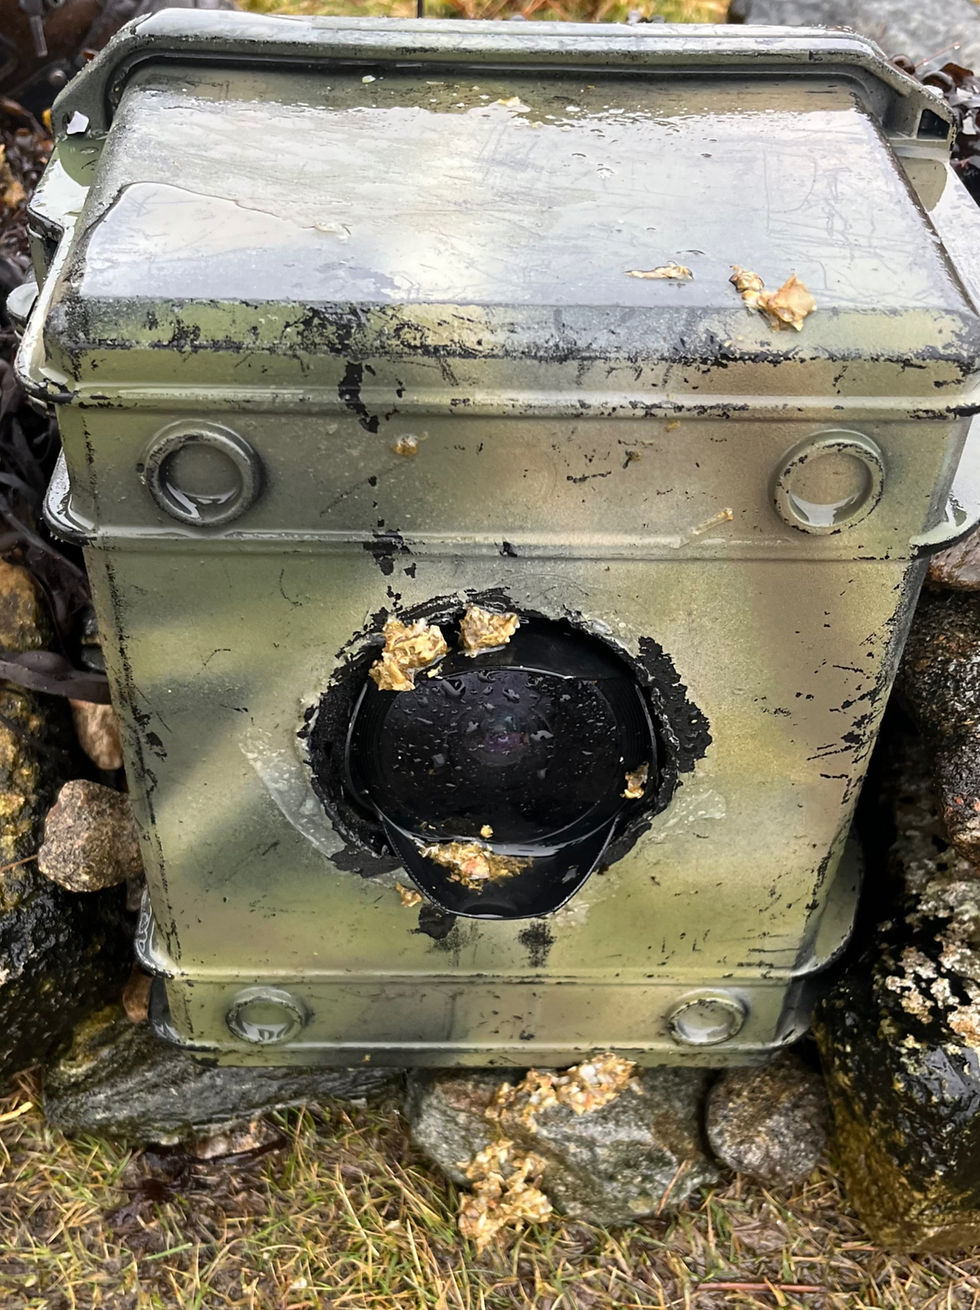
After choosing an appropriate location, leave the "housing only" undisturbed for at least a week. Avoid returning to check on it, as staying away minimizes your scent, which is likely the most intrusive element, even more so than introducing a new object to the area. In my experience, after about a week, if the housing has been detected, it is often used by the otter as a spraint site. This is beneficial from an ethical standpoint but can pose a challenge for photography, as the next image clearly shows.
It may not be easy to tell if your system is having a negative effect, unless you use a trail camera to watch the area and see for yourself any changes in the otters' behavior. This is something I almost always do, unless there isn't somewhere suitable to place one (of course, this is just another thing going out in the field, so it isn't always practical).
Using flash
I have saved this topic for last because it is perhaps one of the most discussed issues in wildlife photography. Flash cannot be used everywhere; I would restrict its use to areas such as spraint sites and avoid locations near a holt or lay-up that could be occupied by a mother and her cubs. Furthermore, I would avoid using flash at eye level. I have arranged systems where flash units are placed either in trees or on the roof of a building. This method not only prevents the animal from being startled by the light but also keeps the noise from the flash away from your subject.
It's crucial to consider the power settings, aiming for the lowest flash strength that still produces a usable image at higher ISO levels like ISO 500 or above (when using flash you will need to test the setup in the dark and manually set ISO, aperture, and shutter and check your exposure is where you want it). I often use diffusers to decrease glare and enhance the look of the final image too. Moreover, some flash units can produce noticeable noise, such as clicks and whirrs. If your flash unit is especially loud, wrapping it in something like bubble wrap can help muffle the noise and reduce its effect on the animal.
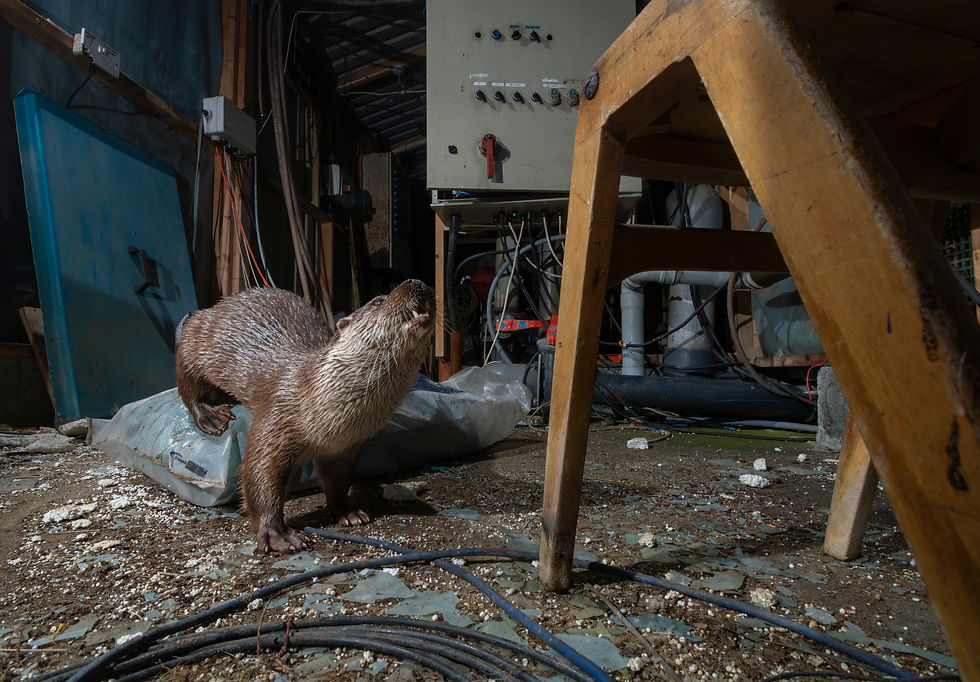

Finally, and perhaps most importantly, ensure your images are impactful. Avoid hastily setting up a system at the first spraint site or animal trail you encounter. Take the time to explore the area, develop a narrative, and experiment with different angles using a handheld DSLR or even your mobile camera before deciding on the final placement. I prefer to create an intriguing image that might include a wild otter as part of a broader scene rather than capturing a predictable otter shot without context. Such perfectly aligned compositions are rare, so be ready to leave a system in the field for months. Although this approach may seem risky, and I have indeed lost systems to the elements before, the resulting images make it worthwhile in the long term.
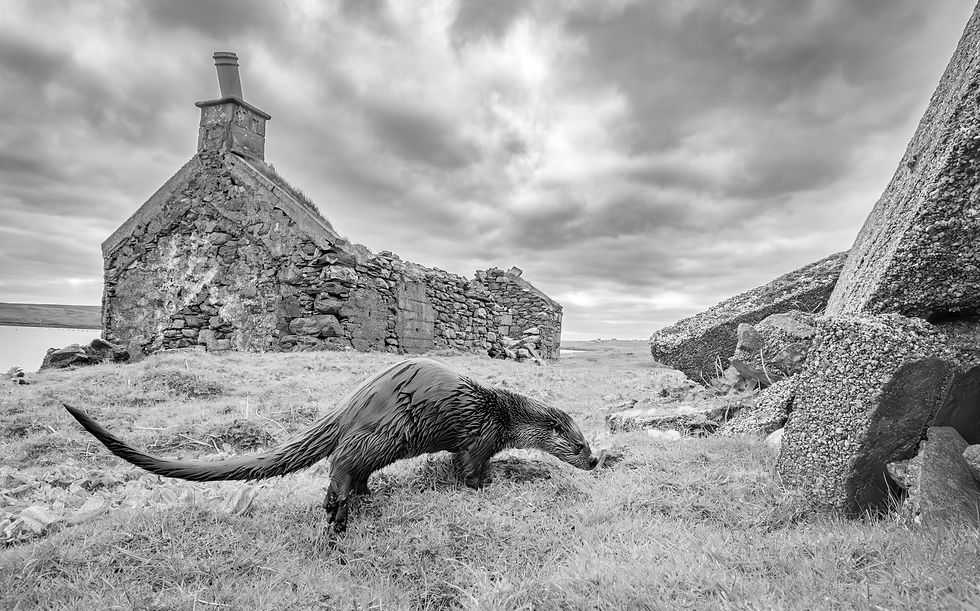
P.S. There are other manufacturers of both sensors and housing for the wildlife camera trapper. Both Cambush (based in the UK) and the US-based Cognisys Inc. have what look like impressive systems. I would love to hear your own experiences with any of the companies mentioned in this blog in the comments.
Best
James


Comments